SansSQL

Monday, March 21, 2016

An Introduction to Microsoft Power BI

Microsoft Power BI transforms your company's data into rich visuals for you to collect and organize so you can focus on what matters to you. Stay in the know, spot trends as they happen, and push your business further.

What is Power BI

Power BI is a suite of business analytics tools to analyse data and share insights. Monitor your business and get answers quickly with rich dashboards available on every device.
Power BI dashboards provide a 360-degree view for business users with their most important metrics in one place, updated in real time, and available on all of their devices. With one click, users can explore the data behind their dashboard using intuitive tools that make finding answers easy.
Dashboards can be created from over 50 plus types of sources like Microsoft Excel, SSAS, Access, Azure, Facebook, etc… and can access the data and reports from anywhere with the Power BI Mobile apps.
Using the Power BI gateways, you can connect to your organisations on premise SQL Server databases, Analysis Services models, and many other data sources to your same dashboards in Power BI.

Architecture of Power BI

The high level Power BI architecture look like below with the different components connecting with each other to give you the power of data visualisation.

Thursday, February 18, 2016

Configuring AlwaysOn Availability Groups - Part 2

In my previous post we have learnt on how to configure the failover clustering. This is the first step and an important pre-requisite in configuring AlwaysOn Availability Groups.
In this post we will learn how to Enable and Configure the AlwaysOn Availability Groups using SQL Server 2016.

Before we start configuring the AlwaysOn, we need to enable this Feature.

Open "SQL Server configuration Manager"
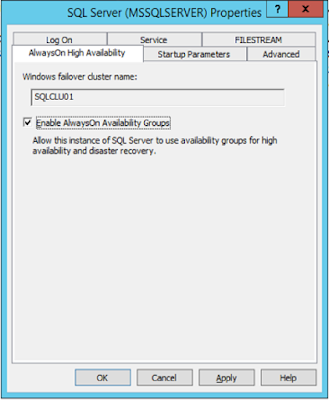
Right-Click on “SQL Server” Service and click on “Properties”

Go to “AlwaysOn High Availability” Tab and Check the box “Enable AlwaysOn Availability Groups” and Click OK.


To Create new Availability Group
Open SSMS and connect to the SQL DB Engine.
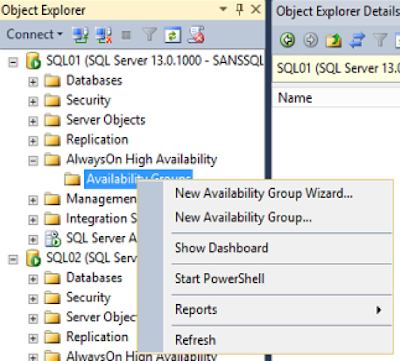
Expand “AlwaysOn High Availability”
Right-Click on “Availability Groups” and click on “New Availability Group Wizard”


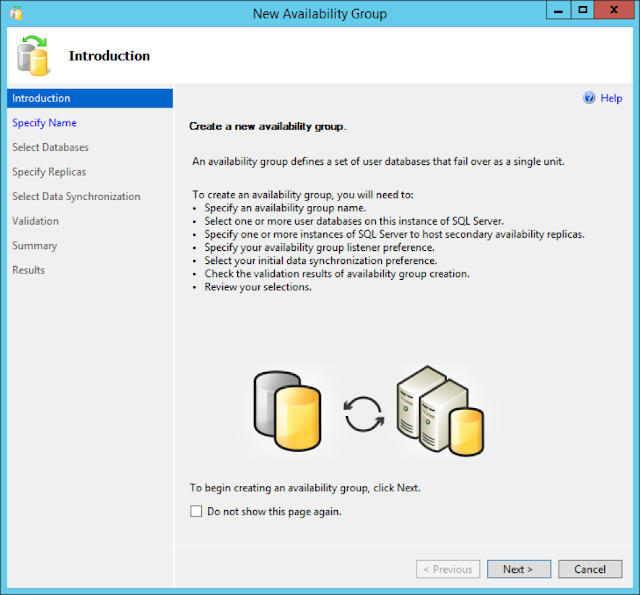
This is will open up the New Availability Group Wizard


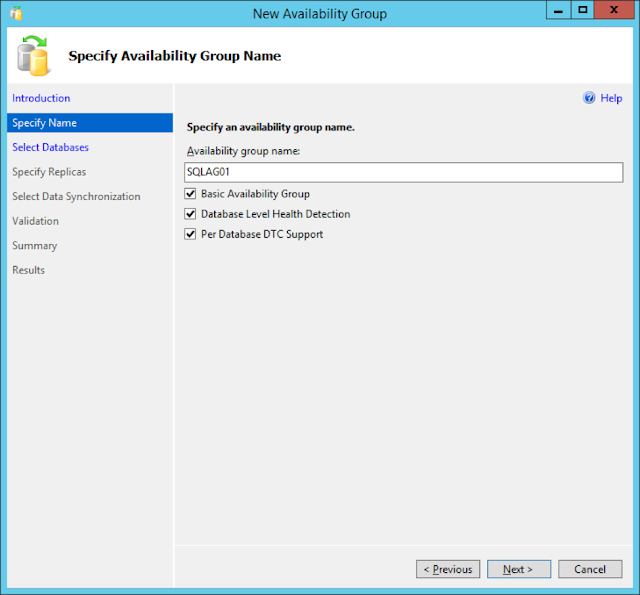
Give a name to the Availability Group and choose the required options and click Next.


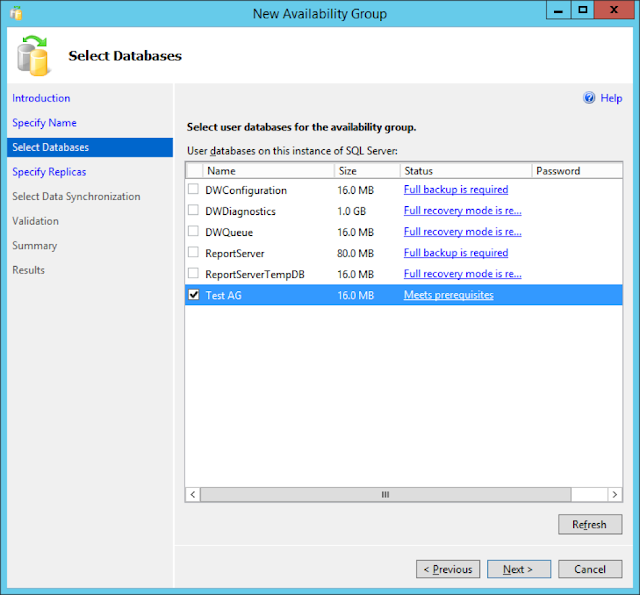
In this page, choose the databases that you may want to be part of this Availability Group.
Additional Databases can be added later as well.


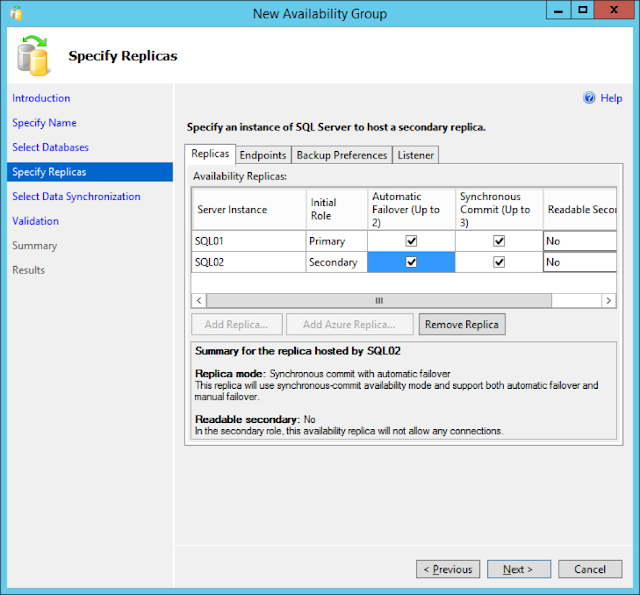
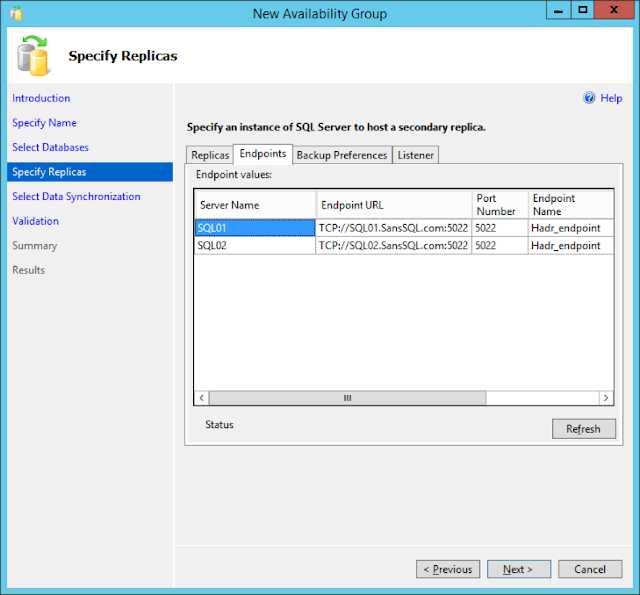
In the next page, Add the Replica SQL Server instances and configure Endpoints, Backup Preferences and Listener for this Availability Group


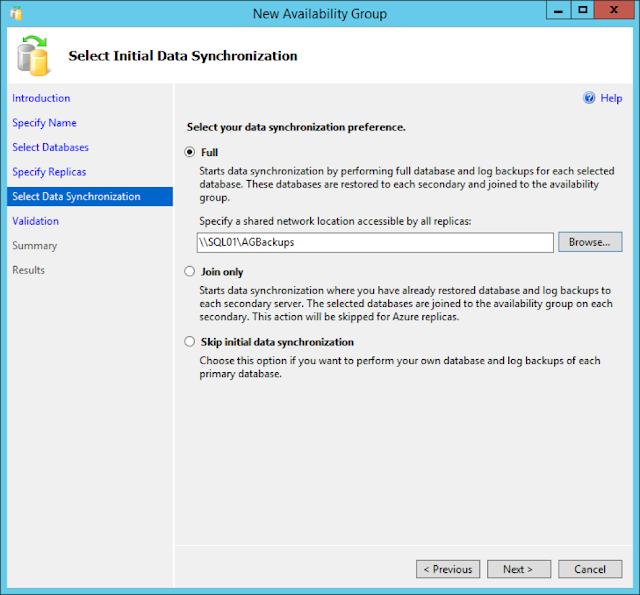
In the next page, specify the Synchronization preference.


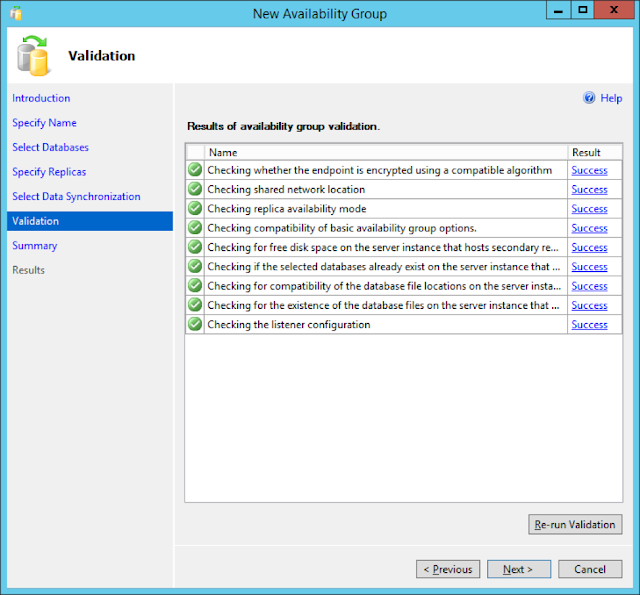
In the next step, the wizard will validate the configurations done so far


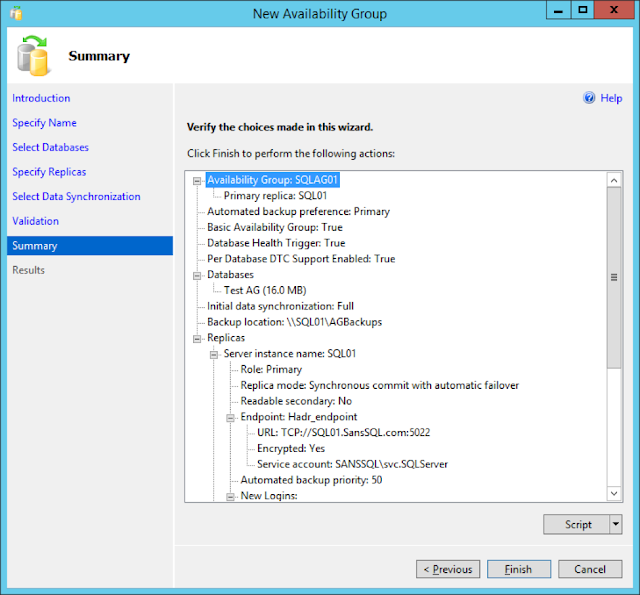
Review the Summary page and Click Finish to start the Availability Group Configuration


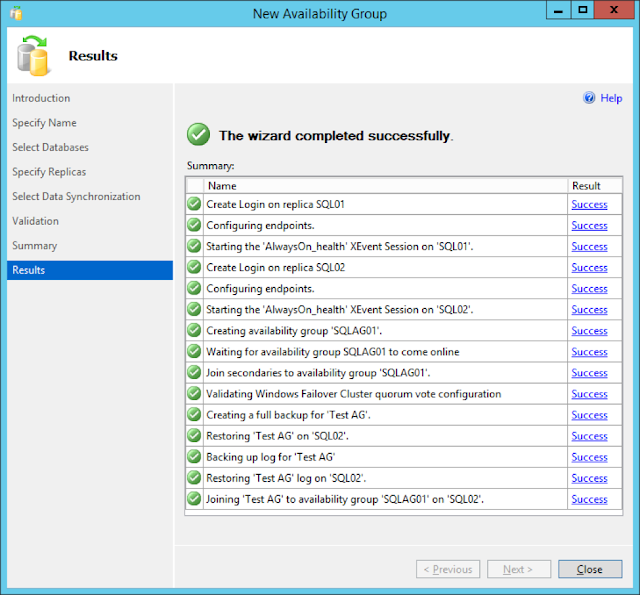
Successful completion of this wizard will create the new Availability Group with the specified databases, endpoints and the listener.

Wednesday, February 17, 2016

Configuring AlwaysOn Availability Groups - Part 1 - Configuring Failover Cluster

The AlwaysOn Availability Groups feature is a high-availability and disaster-recovery solution that provides an enterprise-level alternative to database mirroring. Introduced in SQL Server 2012, AlwaysOn Availability Groups maximizes the availability of a set of user databases for an enterprise. An availability group supports a failover environment for a discrete set of user databases, known as availability databases, that fail over together. An availability group supports a set of read-write primary databases and one to eight sets of corresponding secondary databases. Optionally, secondary databases can be made available for read-only access and/or some backup operations.

In the process of configuring AlwaysOn Availability Groups, the first step is to configure Failover Clustering on the participating servers.

To configure the Failover Cluster

Open "Server Manager" and choose "Add Roles and Features"


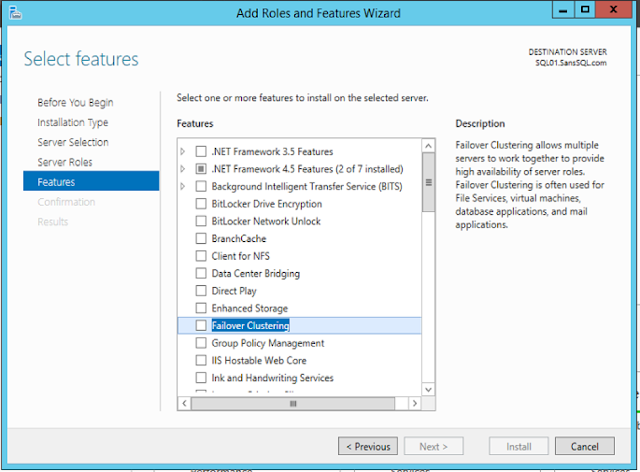
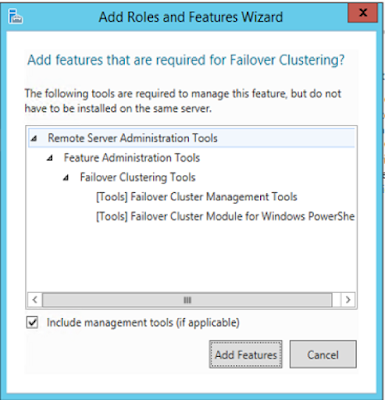
Select "Failover Clustering" and Add Dependency Features


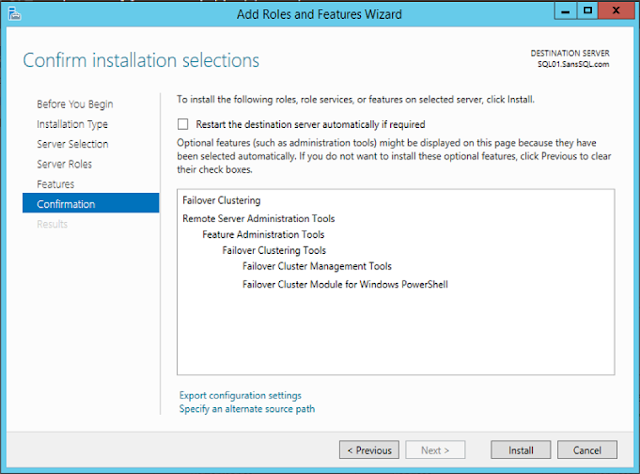
Add Features and Click Next


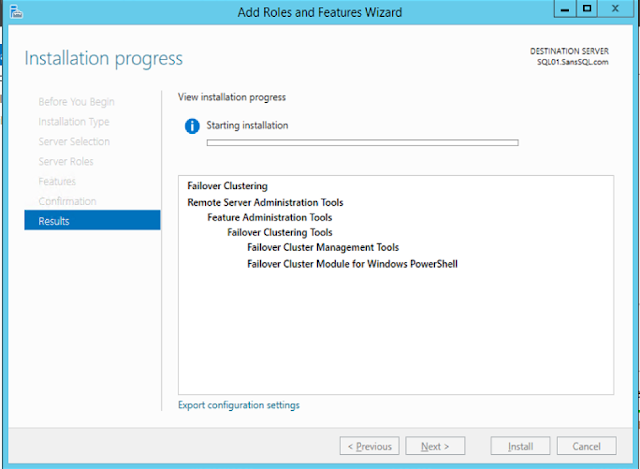
Once you click next, the wizard will start the installation


With this, the required failover clustering components are installed.
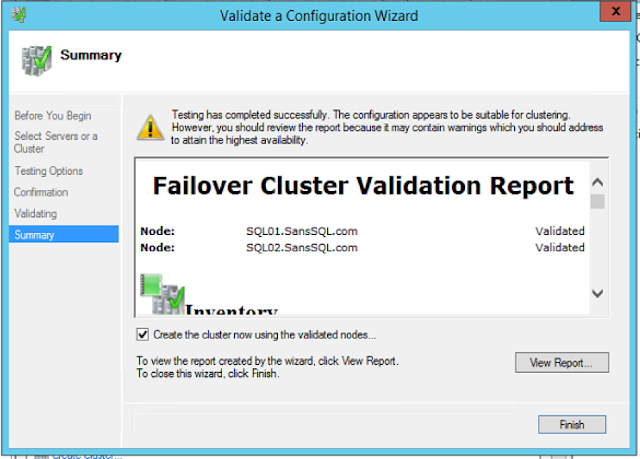
Now we need to create the cluster and before that we need to validate the participating servers for creating cluster.
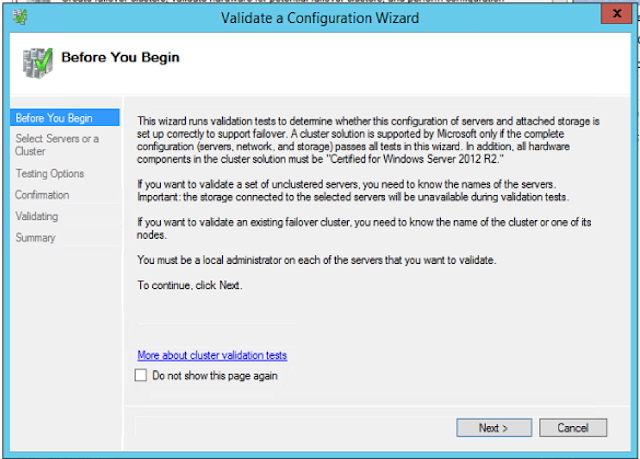
Open "Failover Cluster Manager" and choose "Validate Configuration"


Click Next


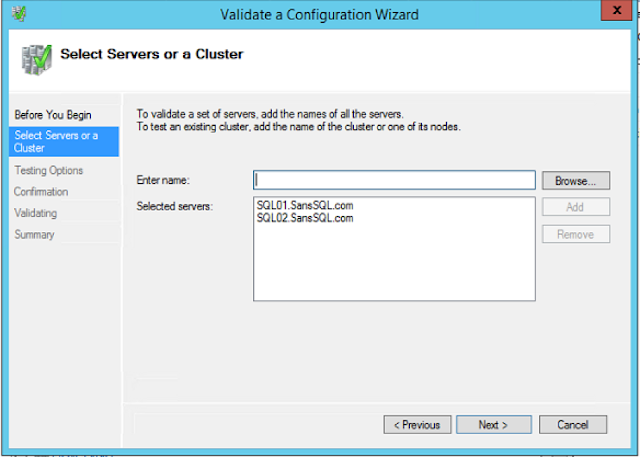
Add the Servers


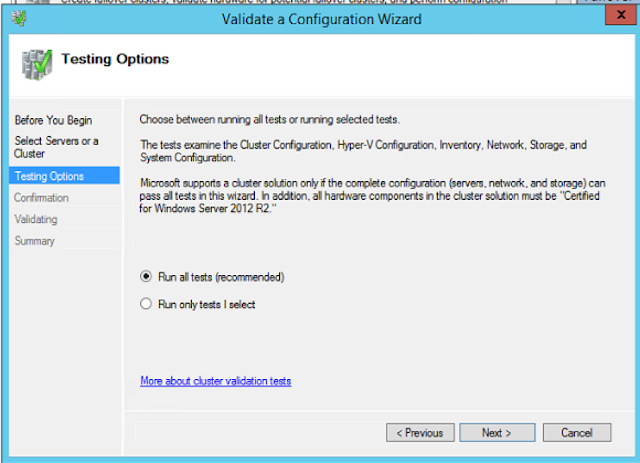
Choose to Run All Tests and Click Next


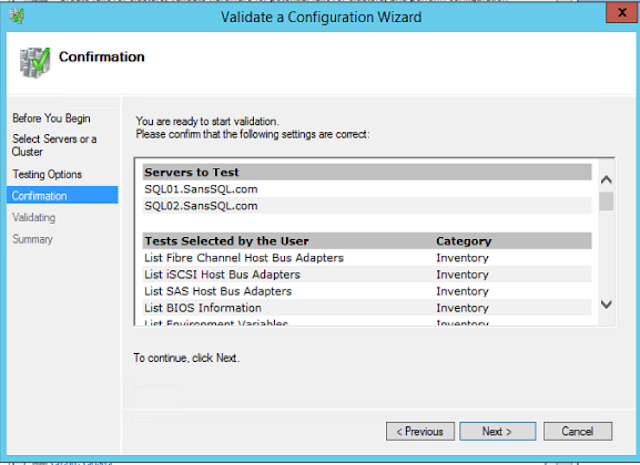
Click Next in the confirmation page


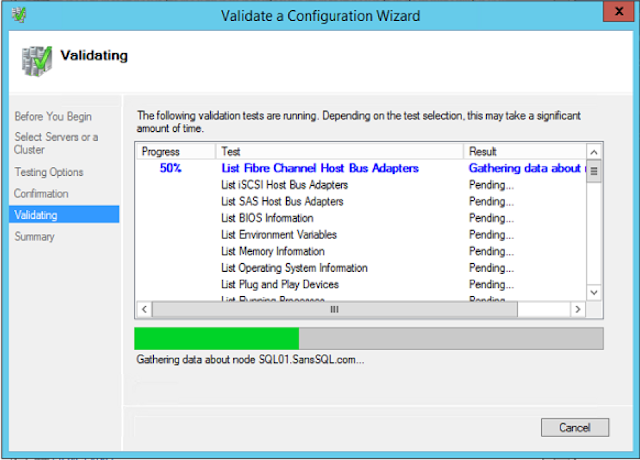
You can ignore the disk related warning in the case of AlwaysOn


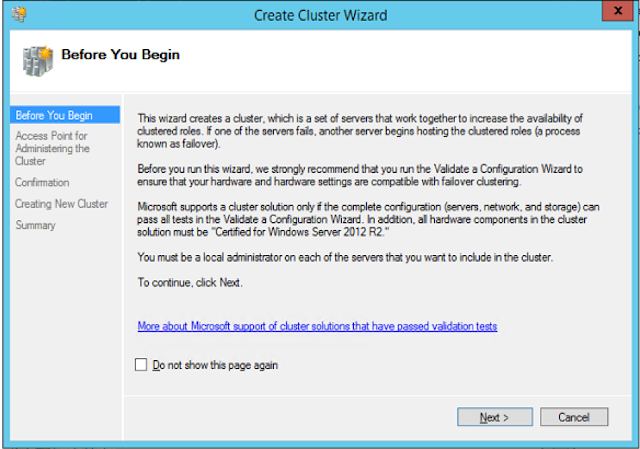
Click Finish and Create the new Cluster


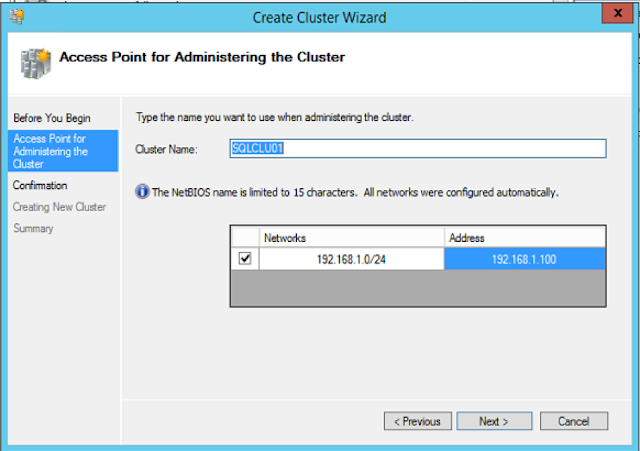
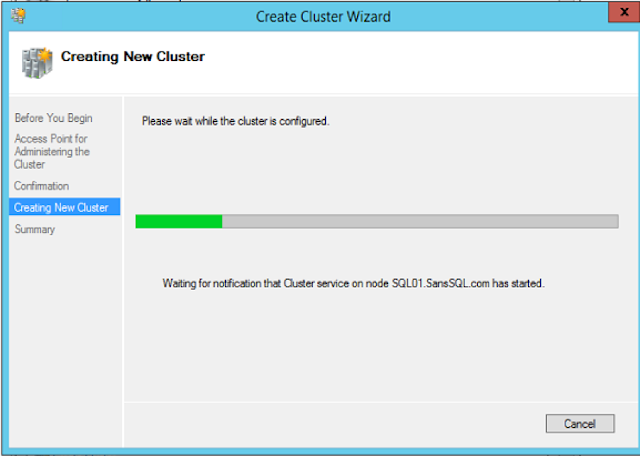
Assign a Name and IP to the cluster


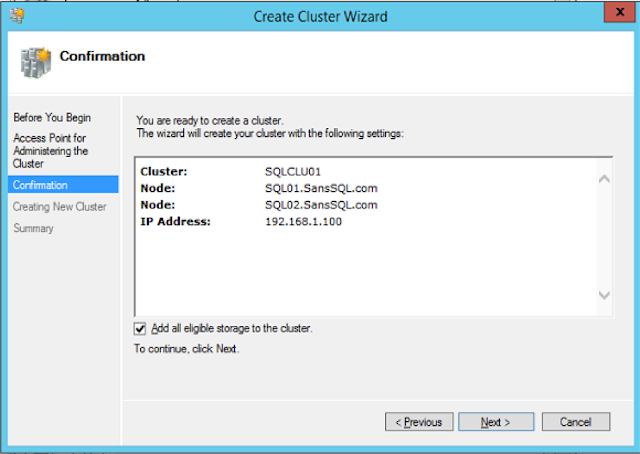
Uncheck "Add all eligible Storage to the Cluster" and click next


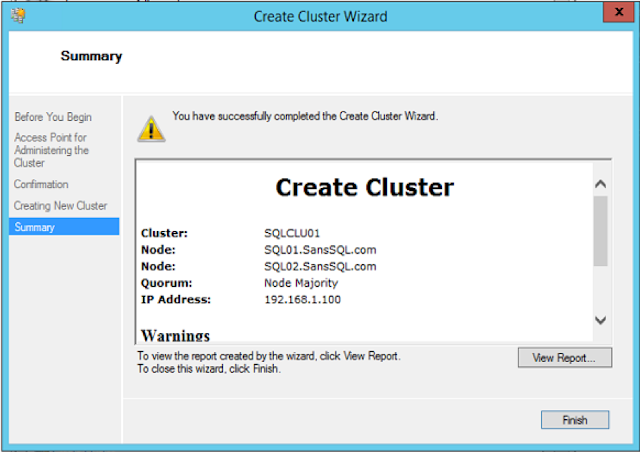
On the successful completion of this wizard, the process of configuring the cluster will be completed.
Now we are all set to configure AlwaysOn Availability Groups.

In the next post, we will learn how to Enable and Configure the AlwaysOn Availability Groups using SQL Server 2016.

Thursday, May 21, 2015

Restore database from corrupt SQL database backup file - Another Guest Post by Jyoti Prakash

Often people have corruption issues regarding Microsoft's SQL server database as well as its backup. Basically, backup is the only way to make your database secured and protective; it helps you to restore your inaccessible files of the main database when any type of corruption or damage occurs. But, what if backup also corrupt, while attempting to restore database from backup file. There could be multiple reasons behind such disaster situation, here in this write-up you will get to know about the reason and solutions behind such case, where SQL Server user faces corruption in SQL Server database backup and not able to restore their databases.

How and why the backup file gets corrupt:     

SQL backup files are basically a replica of your original SQL database, which can be located in different locations on the system. There could be multiple reasons of inaccessible backup file. Here are some most common causes of damaged SQL BAK files:

  • Virus attack
  • Abrupt system shutdown
  • Use of a wrong driver
  • Bad sectors in your system's hard disk
  • Sudden removal of a selected tables, records, and procedures
  • unconventional functioning of Hard disk
  • Improper shutdown of application
  • Wrong database synchronization
  • System crash
  • corrupt database system rules and tables
The most common error message during restoration of database is: 'Backup or restore operation terminating abnormally.'

A Backup restoration error occurs when a filemark in the backup device could not be read. There could be multiple causes of when a user encounters a filemark error. The most common reasons are:
  • A media failure may arise on the same device where the backup is stored
  • A write failure may occur while creating the backup file
  • Loss of connectivity may arise while creating a network backup
  • A failure in the Input/Output path occurs in the disk just after successful write to the disk

Manual Solution:
After backup restore error the first thing you could do is to check whether all the sets of backup have issues or just some sets have issues. It might be possible that only some sets of backup have issues due to which you are getting restore error. In order to retrieve other backup sets from the device, you need to specify the file number. In case, there are multiple backup sets available on a single device, then to determine the usable backup, you can run the following query:

RESTORE HEADERONLY FROM DISK='<Backup Location>'

If you got the usable set from the disk, copy it to another drive for usage and try to restore the damaged files with the help of SQL restore commands. Here are some of the SQL commands that you can use to restore corruption in your SQL database backup.                                 

To recover a database use the following command. This will put your database in the "restoring" state

RESTORE DATABASE <DB Name> FROM DISK='<Backup Location>' WITH FILE = <FileNumber>

Note: Write the backup set number instead of 'FileNumber' that you want to restore.

The following command will take the database, which is in 'restoring' state and make it available for end users.

RESTORE LOG <DB Name> FROM DISK = '<Backup Location>'
WITH RECOVERY

The above mentioned commands are used to restore corrupt backup file of SQL database. However, these corrupt backup recovery solutions provided by Microsoft are not applicable for deep corruption cases. In order to restore your highly damaged or corrupt SQL backup database you can always choose a third party SQL backup recovery software. These professional utilities are designed to restore data from a corrupt (.BAK) SQL backup file.  

Third party applications have functions to restore SQL backup file due to all above mentioned reasons. Before buying any professional backup recovery tool, you need to choose the most reliable one. For that you should use the online demo versions of the backup recovery applications to test their efficiency.

Jyoti is a Sr. DBA - SQL Server at Stellar Data Recovery and has written several article on SQL Server disaster recovery planning & fixing. In addition, she spend her time on Technical forums helping people with the issues related to SQL server.

Wednesday, April 8, 2015

SSRS reports not visible on Google Chrome or Safari

Have you developed a new report in SSRS 2012?
Yes,
Is it working on IE?
Yes.
Okay, is it working on Chrome?
No.
Okay, is it working on Safari?
No.
What's the issue?
Is the new report developed with proper logic?
Yes, No, Maybe?

Don't worry, if the report is working on IE then it should show up on other browsers.
There is an issue with the SSRS 2012. Chrome and Safari render "overflow: auto" option in different way than Internet Explorer.

To Fix this issue,
  1. Open the server where SSRS is installed
  2. Navigate to the path <SSRS Installation Path>\MSRS10_50.MSSQLSERVER\Reporting Services\ReportManager\js\
  3. Backup the file ReportingServices.js
  4. Edit the file ReportingServices.js and append the below code into it
    function pageLoad() {
      var element = document.getElementById("ctl31_ctl09");
      if (element) {
        element.style.overflow = "visible";
      }
    }
  5. Save the file
Now you should be able to view the reports on Chrome and Safari.
The div name is not always ctl31_ctl09. So, if you are still unable to view the reports on chrome and safari after the change, make sure to replace the highlighted div name in the code to the right div name of yours. This could be found by looking at the HTML source of report URL from your browser.

Update:
Another workaround for this problem is through the CSS.
  1. Open the server where SSRS is installed
  2. Navigate to the path <SSRS Installation Path>\MSRS10_50.MSSQLSERVER\Reporting Services\ReportManager\Styles\
  3. Backup the file ReportingServices.css
  4. Edit the file ReportingServices.css and append the below code into it
    div {
    overflow: visible !important;
    }
  5. Save the file

Ads